This guide will walk you through the manual setup of an IKEv2 VPN connection on your iOS device using the built-in VPN settings.
also Learn How to set up IKEv2 VPN connection on Mac
What You Need
- A secure VPN connection (Don’t have one? Sign up here!).
- Access to your VPN account details.
Step 1: IKEv2 VPN Setup
- On your iOS device, open Settings.
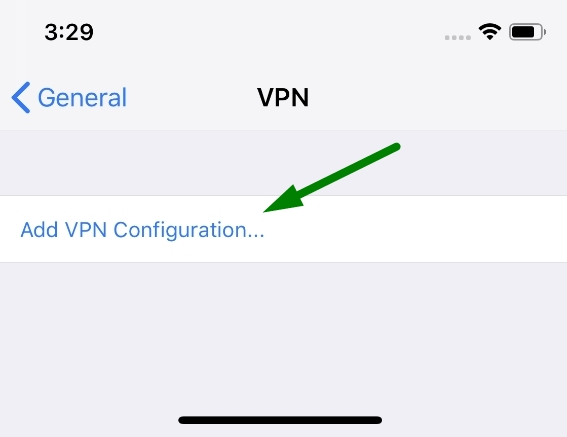
- Navigate to General > VPN.
- Tap the Add VPN Configuration button.
Step 2: IKEv2 VPN Configuration
- Select the IKEv2 option.
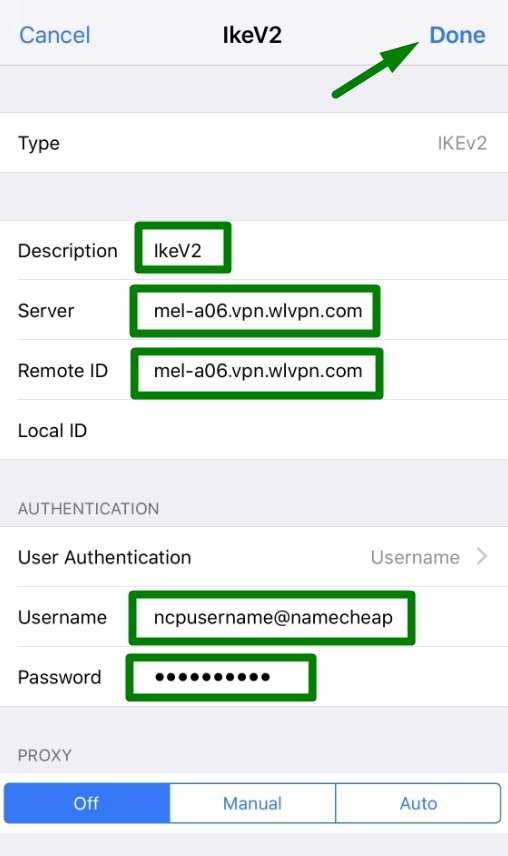
- Enter the following configuration details:
- Type: IKEv2
- Description: Enter any description to easily identify the VPN server.
- Server: Choose your preferred server from the list provided in your VPN account (e.g.,
mel-a06.vpn.example.com). - Remote ID: Same as the Server field.
- Local ID: Leave this field empty.
- User Authentication Type: Username
- User Name: Your VPN account username.
- Password: Your VPN account password.
- Proxy Settings: Off
- Tap Done to save the configuration.
Note: When copying and pasting your credentials, ensure there are no extra spaces before or after the entries.
Step 3: Connecting to Your VPN
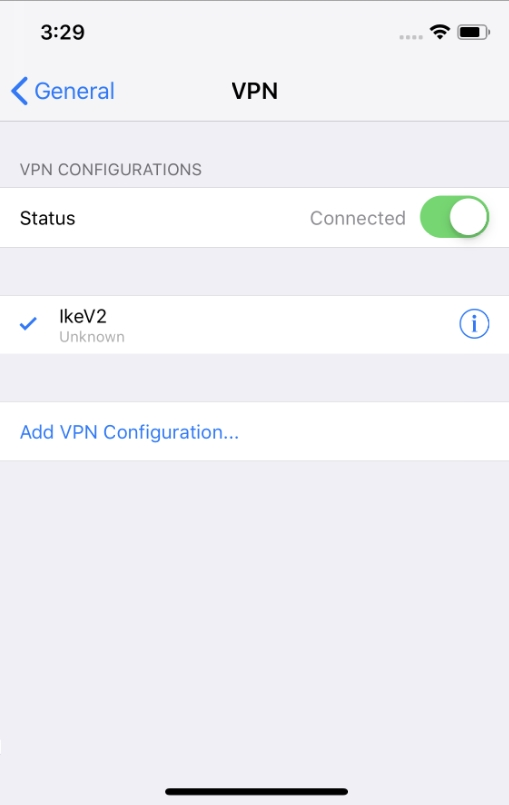
- In the VPN settings, select the configuration you just created.
- Toggle the Status switch to the ON position.
- Once connected, the status indicator will turn green and display Connected.
Here is detaild Tutorials
—————————————————————————————————————————————-
How to set up IKEv2 VPN connection on iOS
Step 1: IKEv2 VPN Setup
On your iOS device, go to Settings > General > VPN and click on the Add VPN Configuration button:
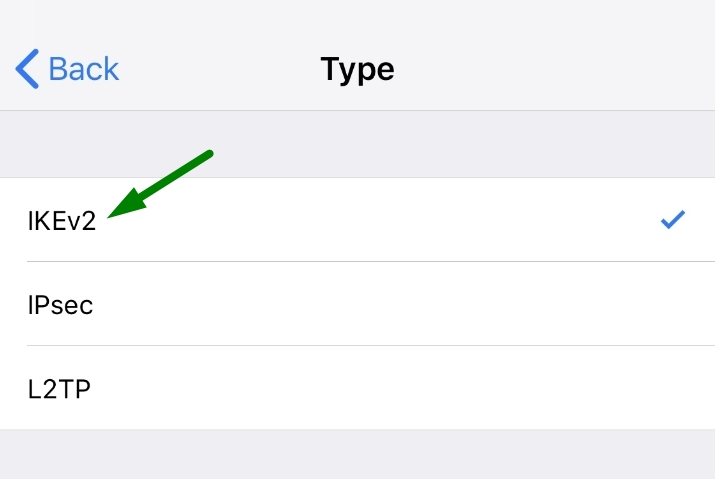
Step 2: IKEv2 VPN ConfigurationEnter the following configuration:
- Type: IKEv2
- Description: any description to identify VPN server
- Server: select your preferred server from the server list from the VPN Account Panel (e.g. mel-a06.vpn.wlvpn.com)
- Remote ID: same as the Server field
- Local ID: empty
- User Authentication type: Username
- User Name: your VPN account name from the VPN Account Panel
- Password: your VPN account password from the VPN Account Panel
- Proxy settings: Off
Click Done to complete the setup:
To connect to our VPN service, select the configuration that you have just created and turn on the VPN Connection by toggling the Status button to the ON position:
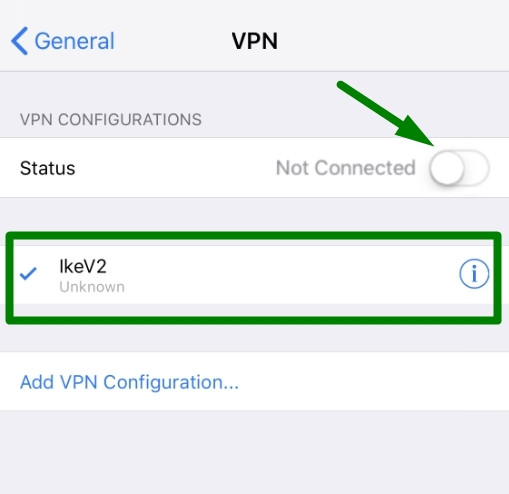
Once the VPN connection is successfully established, the status will turn Green and states Connected:
